January 14th, 2010 — 5:11pm
I seem to have cupcakes on the brain today!
I’ve been thinking about the cupcake flags and cute sayings to put on them. So far I have
“Eat me!”
“Let there be cake!”
“Love is sweet!”
“The best is yet to come!”
“Be happy, eat cake!”
“Be mine!”
“Sweets for my sweet!”
“Delish!”
“Yummy!”
“Enjoy!”
“Cute as a cupcake!”
Can you think of any more?
They’ll be super easy to make, I just think they’ll be one of those things that will be really worth it!
Comment » | Cupcakes, DIY
December 27th, 2009 — 8:34pm
After the weeks of preparing, it took about 40 minutes to put the Christmas table together. It was quite hectic trying to arrange everything before the family arrived but we managed. Despite my best efforts to be prepared I still forgot a few things, but it all turned out well in the end and we improvised with a few new vases.
Comment » | DIY, Laura's Life
December 27th, 2009 — 8:18pm
Christmas Eve was super busy, as I’m sure it was for hundreds of other people, but as late as 10.30 I was up decorating the bags for the peppermint sandwich cookies.
Earlier on in the day Hayley helped me “Christmasfy” some boring candle holders and vases ready for the Christmas table.
Just a few mini touches made even the most plain looking candle sparkle with Christmas.
I was up early and managed to get in to Hobbycraft for opening, they had already started to reduce their Christmas range so I picked up a few packs of stickers, ribbon and sparkley baubles.
These were old holders that came with fragrance candles all ready in them, I’d already burnt down most of the candle, so I took those out and put tea lights in them. They are slightly frosted so they look really pretty with tea lights in them.
1 comment » | DIY, Laura's Life
December 21st, 2009 — 12:25pm
I’m not entirely sure where the idea came from but I decided I would make wooden snowflake decorations for people this year.
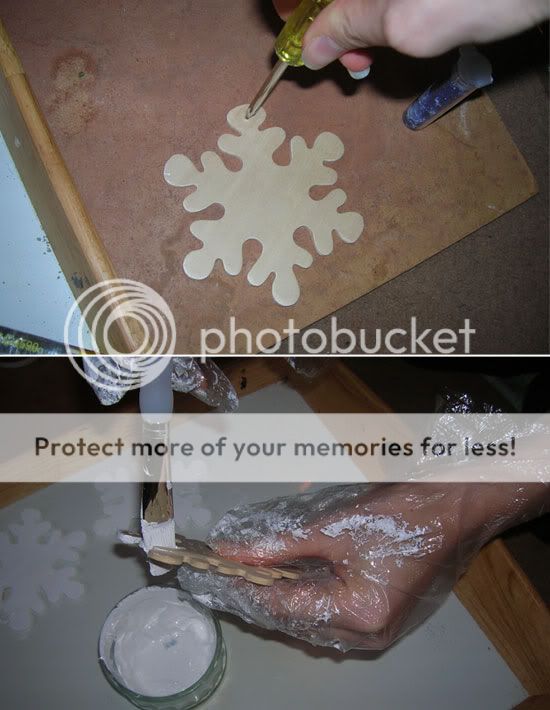
I bought 9 wooden snowflakes from eBay and made a hole big enough so I’d be able to push ribbon through later.
I then painted both sides with white acrylic paint. I did add blue glitter to the paint but it didn’t work out so well. The paint just coated the glitter so I didn’t really get the effect I was going for.
I left them for a few days to dry. If I did this project again I would definitely hang the snowflakes up to dry instead of lying them flat. When I came to paint the other side bits had dried on the opposite side in lumps, so it wasn’t as smooth as I would have liked.
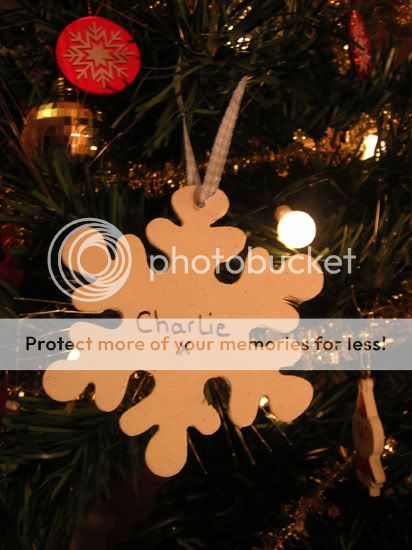
Once they were dry I wrote the names on and poked the ribbon (also from eBay) through the hole.
I’m really pleased with the way they have come out. I shall be giving them out on presents but hopefully they will get put up on Christmas trees too!
Comment » | DIY, Laura's Life
December 15th, 2009 — 9:32pm
What do you think?
Had a quick play around tonight with the things I had. On the day I’ll have white table cloths and silver crackers. Also I’m not sure whether the plates will be set ready on the table.
My little Christmas tree candles are from Laura Ashley
I intend to write and attach name tags on to the baubles in the wine glasses and also place either a white or silver table runner down the middle.
I’m also giving peppermint sandwich cookies in little white bags as Christmas favours. As soon as all the bits and pieces arrive from eBay I’ll be starting that project.
Because the table will have to accommodate 15 people I don’t want there to be an obvious centre decoration. I don’t want things to look too symetrical. I’ll be getting more candles over the next couple of days but so far I’m really pleased with the way it looks.
What do you think?
Comment » | DIY, Laura's Life
December 15th, 2009 — 5:23pm
This year the 15 (!) of us will be spending Christmas around my aunt and uncles house. Over the last year or so their house has undergone major surgery! I’m talking about major renovations to the downstairs of their house. They have knocked through walls and created new spaces. It’s taken a while but it’s all slowly coming together.
It means however that their dining table and other pieces of furniture wont be arriving until just days before Christmas! Eeek! So as well as organising the Christmas dinner my aunt has to deal with the stress of organising her home.
I sent her an email asking if she needed any help and I have been put in charge of decorating the table. For the last two years we have had Christmas dinner round my Mom and Dad’s where I have arranged the table, so I’m getting quite used to this job role!
This year I have decided to go with a winter wonderland theme. I have picked up inspiration from a number of places and have already bought a few bits. Tonight when I get home I shall be doing a few test runs to see how if looks and decide on what else I need to get to complete the look.
Comment » | DIY, Laura's Life
December 13th, 2009 — 7:15pm
The very talented and very lovely Suzie made these super cute felt initials for us.
Thank you Suzie!
Comment » | DIY, Venue Decoration
December 11th, 2009 — 10:34am
Following on from my post about chalkboard menus I’ve been keeping my eyes open for nice ones I can use.
I came across this tutorial today from
Canadian House and Home on how to make your own chalkboard place cards. If I do have trouble finding the right chalkboards for our menus this wouldn’t be too hard to follow and I think I could do it quite cheaply.
Materials and Tools
- 4” x 6” picture frames
- 1 sheet hardboard
- 1 primer (for hardboard)
- 1 blackboard paint (for hardboard)
- 1 L latex primer (for frame)
- 1 L latex paint (for frame)
Inexpensive wood picture frames are widely available at décor and craft stores. Ours measured 4” x 6”. A 1/8”-thick sheet of Masonite (also known as “hardboard”) can be purchased in sheet form at building supply stores. At the store, get this sheet cut into 12 pieces, each measuring 5-7/8” x 3-7/8”.
Step 1: Prepare frames
Remove the glass inserts and cardboard backings from each frame.
Step 2: Apply blackboard paint
The keys to success are to apply several coats (two to three), let each dry thoroughly, and allow the final coat to cure for several days before writing on the surface.
To prepare the surfaces, lightly sand the area with 120- or 140-grit sandpaper (this will allow the paint to adhere best to the surface). Wipe the surface with a damp cloth to clean away all dust.
Using low-tack masking tape, carefully tape off the area you will be painting.
Apply a coat of primer
Leave to dry overnight.
Apply a coat of blackboard paint
Leave to dry overnight.
Apply a second coat of blackboard paint. Leave to dry thoroughly. If needed, apply a third coat. Wait at least three days (and ideally seven) before writing on the blackboard surface.
Step 3: Paint picture frames
Paint the picture frames to finish the look.
Once all paint is dry, reassemble frames (with Masonite in place of glass).
It actually sounds like quite a fun little project to do!
Comment » | DIY, Venue Decoration
December 1st, 2009 — 2:30pm
I’m thinking about having mini cupcakes on our candy table. The first lady we spoke to about cupcakes makes to most adorable mini cakes. If we do go ahead with this idea I really want to add cupcake flags like these.
I think they look super cute, especially when they have things written on them like “Eat me”, “Yummy” and “Be Mine”
They’d be really easy to make and would take very little time but they would look so good!
Comment » | Candy Table, Cupcakes, DIY
November 29th, 2009 — 1:10pm
For the last few years I have made our Christmas cards. I used to make cards for all ocassions and have a cupboard full of crafty goodies, but over the last few months I haven’t really had the time to make any.
I decided I would make time and do our own Christmas cards. I put together a few ideas using Illustrator and Photoshop and printed them off on fancy card. To finish off the cards I’ve been adding some Christmas sparkle and roped Has into helping me this morning.
I don’t want to post a picture of the cards until I’ve given them out to people. But I’m rather pleased with them!
I’ve actually had a rather crafty day today… stay tuned for another Christmas project I’m working on!
Comment » | DIY, Laura's Life